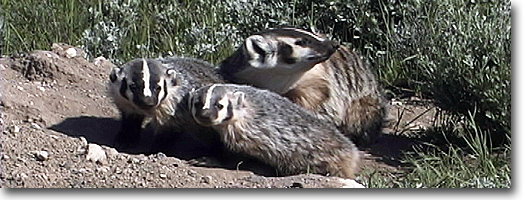
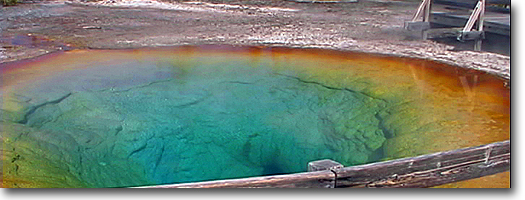
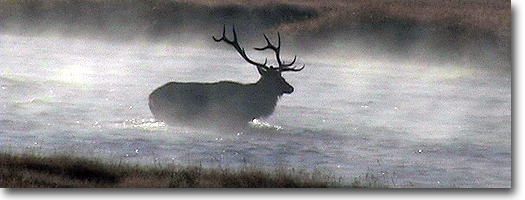
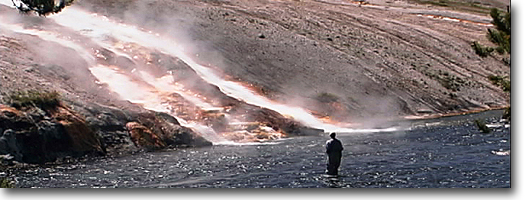
The Landscape
There are few things more joyful to us
than the thrill of photographing the landscape, and because it's so
accessible and so abundant, we're never in short supply of subject matter.
The best part, of course, is that the light is never the same twice:
we can visit the same area at the same time every day and never get
exactly the same picture-even subtle shifts can produce dramatically
different results.
But good landscape photography is not
as simple as it seems. The trick is learning how to find the key elements
of a scene that will make your pictures sing. You must teach your eye
to evaluate an enormous set of possibilities, then translate the scene
into a photographic image that will convey all the depth, scope, and
drama of the image.
There are a number of techniques that
can help you avoid many of the mistakes that are made by the average
point-and-shoot photographer.
BASIC LANDSCAPE DESIGN
Simplify, Simplify, Simplify
If there's one thing that we try to get
across to students in our photographic classes, it's this: simplify!
In nature it's so easy to get lost in the clutter. The landscape as
the eye sees it is dramatic, pleasing, harmonious. But the camera is
more discriminating. It will capture for eternity the exact moment of
the place, and along with this come all the quirks, wrinkles, and clutter.
This is why you need to be very clear
about what you intend to photograph. Know your subject before you begin.
If you have to sit and stare awhile before picking up your camera, then
do it. Make a frame with your fingers like the old-time movie directors
did, and pan the scene. For example, let's look at a mountain scene:
the mountain is there, of course. There are some trees in the foreground;
the sky is spectacular. There's a cabin off to the side. There's a fence,
a couple of horses. Oh, and if you look a little closer, there are some
low bushes, a dip in the landscape where a stream cuts through...
Sure, it all looks great together: the
epitome of the American West. But shoot it exactly as you see it, and
what happens? The horses look like ants, the dip of the stream becomes
a strong horizontal line across the bottom that doesn't make sense to
the eye, the trees are close and out of focus... there are so many ways
to get this shot wrong that we can't enumerate them all.
So think about this scene some more.
What's the point you're trying to make? Do you want to capture the spirit
of the American West? Then maybe place that cabin in the foreground
as the main subject, with a backdrop of the mountain. Are you trying
to suggest the majesty of the wilderness? Then maybe isolate the mountain and sky. Tackle the scene any
way you wish, but know what your goals are first. In landscape
photography less is always more.
Illustrating Scope
Traditionally, the sheer magnitude of
a scene has been captured with a wide-angle lens. But panoramic images
have become increasingly popular in recent years. While this new format
can be very appealing, it would be a mistake to think that it solves
all the problems of capturing the drama of the landscape. Whether you're
using a normal lens, a wide-angle lens, or a camera with panoramic capabilities,
the problems of composing a panorama of the landscape remain the same.
To evoke the openness of the landscape,
compose your photo with an emphasis on the distant horizon. Using the
Rule of Thirds, place the transition from earth to.sky on one of the
two horizontal planes. If there's a mountain peak or lone tree, try
placing it off center one way or the other. A billow of clouds can also
be placed in this manner. To emphasize a sense of space, keep the amount
of foreground in the shot to a minimum.
Try various vantage points. Shooting
down on the scene may emphasize the harmony of the environment. Shooting
up at it may intensify its impact.
To illustrate scope, try to maximize
the impact of the expanse of land across the cameras plane. To illustrate
depth, your goal is to display the expanse of land that stretches away from the camera. You do this by choosing a foreground feature as your
primary subject.
The foreground adds tension to the image
and helps connect viewers to the photograph immediately, by drawing
them into the scene and beyond to experience the complete environment.
To best illustrate depth, you should
shoot a scene for maximum depth of field: your aim is sharp focus from
foreground to background. This can be difficult to achieve, and often
means shooting with a very small aperture, fl6 or ill. If there's even a gust of wind, the recommended shutter speed may be
lower than you can reasonably use with this small aperture setting.
If this is the case, open up to the required f-stop and let the far
background go into soft focus.
But don't let the foreground image lose
its sharpness; if you can't get the foreground sharp, try another lens
or change the camera's position. Sharpness is everything in this type
of shot. If you can't get it, don't shoot.
And don't forget to experiment with the
differences between the vertical and the horizontal format. Often the
solution to your design problem becomes obvious with the turn of the
camera.
THE EVER-CHANGING LIGHT
Natural light is an amazing thing-it
changes hour to hour, day to day, and month to month. The light's color changes throughout the day, starting warm in the morning,
turning blue as the afternoon progresses, and turning back to warm before
darkness creeps in. The angle of light changes too: daily changes
are obvious, of course, but seasonal effects give us some of our most
spectacular moments. The intensity of light also has a great
impact: pictures recorded at noon on a brilliant day will have a very
different mood from those shot in the same place on a cloudy day. Light
tends to bounce off other things, too, and this reflected light
can cause glare and harsh hot spots on film, or it can be harnessed
to fill in shadows.
Pick a scene you like, maybe one you
travel by often on your way to work. Every day, look at what the light
is doing. When it sparkles, note the month. When it glows, note the
time of day. If you have a minute, stop and look closer. Ask yourself
what it is about the quality of the light that draws your attention.
Do you love its mellow mood? Or are you drawn to its vivid intensity?
Light can change any scene into something completely different. We're
always surprised when someone says to us, "Oh yes, I've already
shot that. I was there two years ago." Wow! That scene has been
through thousands of variations since then. Nature shows us its many
moods every day. What you do with these moods is up to you.
The Edge of Light
Early morning and late evening are the
witching hours of landscape photography. Scenes that you walked by all
day suddenly begin to glow; clouds shimmer in warm tones of yellow and
red; silhouettes spring to life.
You have to be ready when the light begins
to change and shift- colors come and go quickly. When we're traveling,
we scope out a new area during the day so we're ready when these magic
light shows begin: we determine where the sun is likely to rise and
set; we note likely subjects and backgrounds. Then, about half an hour
before we think the light is going to change, we set up our tripods
and wait. If we're spending a few days in the field, we note the successes
and trials of that first day so we can alter our plans for the next
day.
When you expect spectacular light,
plan ahead: know where you're going to shoot so that you're ready when
the light starts to change.
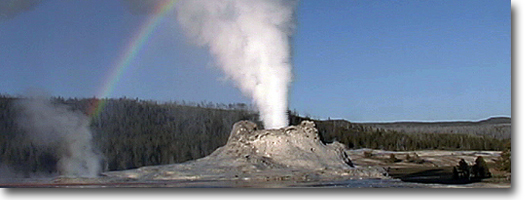
Weather
Along with the time of day, weather can
play a huge role in creating memorable, moody images. A foggy morning
or a rainy afternoon turn the landscape into a distinctly intimate environment.
When the sun peeks through and reflects off these damp surfaces, a riot
of possibilities occur. And we couldn't live without storms. We're always
on the lockout for a buildup of cloud banks for creating moody images
or adding some intensity to a special scene. See chapter 8 for further
discussion of wild sky conditions.
SPECIAL PLACES
Over the years we've traveled quite a
bit, and we've encountered lots of situations where we said, "If
only we knew such-and-such about this place, we could have come another
time or stopped at another vantage point or brought a different piece
of equipment." Before taking a trip, plan ahead to avoid disappointment:
know what kinds of conditions you might encounter, and be prepared.
We usually call the National Park Service in the state to which we're
traveling for information on things such as peak foliage and wildflower
blooms. Travel guides give us ideas about our routes and the best time
to travel in certain areas.
Mountains
Mountains love the light of early morning
and late afternoon, when the sun kisses the tops of ridges and brings
out the best they have to offer. Mountains create a dramatic silhouette
when they're backlit by a rising or setting sun. Add some foreground
to give your picture depth, and use the Rule of Thirds when you place
your horizon.
Remember that the snow flies earlier
in the mountains, so any trip to high elevations should be planned with
the knowledge that passes can close suddenly and storms can appear out
of nowhere. We have actually been prevented from crossing a pass in
mid-July! Call ahead to find out conditions of any major passes you
intend to cross on your travels.
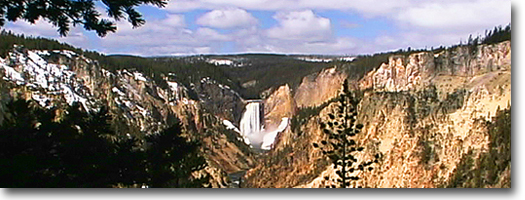
Canyons
We have sometimes found ourselves in
canyons too early in the morning: light that's playing havoc with the
surrounding ridges often doesn't make its way onto the canyon walls
until later. Before that moment the canyon is dark and flat, and after
the sun rises enough to stream directly in, the light is hot and shadowless.
But oh, that moment between! It's definitely worth getting up and waiting
for. The sun reaches over the walls and angles into the canyon and suddenly
brown cliffs shimmer with a reddish glow. Shoot up at the walls and
accentuate their colors with a slice of brilliant blue sky at the top
of the frame.
Canyons seem to have their own weather:
very chilly mornings are often followed by scorching afternoons. Be
prepared for all sorts of weather.
Moving Water
Overcast days are a great time to shoot
around streams and waterfalls. The soft light brings out the intensity
of the colors and keeps the reflections softer and more subdued. You'll
need your polarizing filter to control glare.
Experiment with different shutter speeds
when you shoot around moving water: make a stream smooth and silky by
shooting at Yi second, or catch every bump and ripple by shooting
at 1/2. Try running a whole series of shutter speeds at one location.
You'll be pleasantly surprised at the variety of interesting effects.
If you're going to hike in to a special
waterfall, ask a ranger when to expect the best light. Many waterfalls
are in deep forests, where they get a lot of shade. Sometimes midday
is the only time they're properly illuminated. Again, play with shutter
speeds to create different effects.
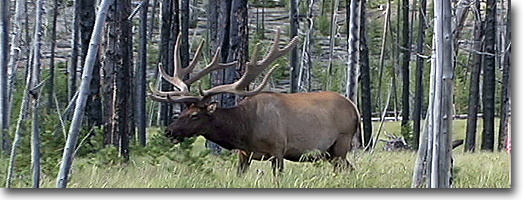
Deep Forests
Because the treetops create a heavy canopy,
the deep forest has an environment distinctly its own. It's a world
of green, and for us, the more intense and mistier, the better. Textures
and colors are intense at midday, when the light is strongest. When
you're hiking through deep
forest, look for moments of high contrast:
the rich brown of a tree trunk against a wall of green; the intense
yellow of a mushroom emerging from a rotted stump. Look up to see slivers
of brilliant blue behind clouds of green leaves. Take along a small
reflector to help bounce light onto shadowed subjects.
Fall Foliage
A swirl of vivid autumn colors is often
so intense that it's tempting to just point and shoot. Avoid this impulse,
and instead study the forest for subjects that can anchor your image.
Look for simplicity of line and form amid the sea of color to achieve
a shot that's really memorable. A dark branch against yellow leaves,
brilliant white birch bark in a sea of red and orange, or a sliver of
blue sky framing a solitary maple tree all offer tantalizing possibilities.
You can find spectacular autumn foliage
in many places across the country. Though we are partial to our New
England leaf season, we have often traveled to Colorado to catch those
intense yellow aspens against the brilliant mountain skies. You can
call the National Park Service or your state's forest service to get
recreational information. Some state governments even have 800-number
hotlines to keep you up to date on foliage changes.
|