%20of%20compositionbar.JPG)
Good
photographs don't come from fancy camera equipment, dramatic lighting
equipment, or special effects. Photographs that stand out in terms of
their ability to engage an audience's interest and imagination have
one source: the vision of you, the photographer.
It is your eye that makes decisions on
what you want to share with viewers of your work. Success is measured
by what you decide to include in your photograph and what you eliminate,
as well as by your choice of angles and lighting.
The most important thing you can do to
improve your photography is to take the time to train your eye. We all
see images every day that attract our attention. But have you ever stopped
to ask yourself why a particular scene causes you to pause? What is
it about the scene that makes it so special? To help train your eye,
try to go by the same scene every day and take a close look at it. Is
it special every day? Probably not. Find out why.
We find our blood starting to stir every
fall. We itch to get out with our cameras, well before the colors of
the trees start to change. Why? Because the angle of the light in autumn
captures our imagination, and makes ordinary, everyday scenes glow in
a way they don't the rest of the year. The low angle of the light brings
out patterns and textures we don't see the rest of the year. For you
it may be another season-some photographers love the crisp intensity
that only winter brings, for instance. Find out what kind of light inspires
you, then determine what subjects most often draw your attention and
concentrate on them.
When you're able to articulate your preferences
and the reasons behind them, it's time to pick up your camera. Remember,
while your eye and the camera's lens have a lot in common, the camera
has certain powers that you don't. It can zoom in on details that your
naked eye can't. It can home in on the frame of the image that interests
you and block out everything else. Learn to use these powers to your
advantage.
Of course, your camera also has certain
limitations. While you have two eyes to take in a scene, the camera
is limited to one. While your eye and mind can balance the details in
highlight and shadow, you may find your camera and film unable to record
these details as you perceive them with your eye. Understanding the
limitations and strengths of your camera equipment and film are the
first steps toward taking consistently better photographs.
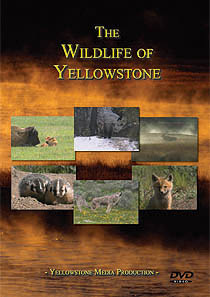
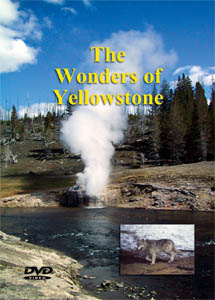
"The Essenstials for
Planning your
Trip to Yellowstone Park" |
|
|
|
|
IDENTIFYING YOUR SUBJECT
Every photographic situation provides
you with an array of choices. Imagine that you're photographing Little
League baseball players. Take in the whole scene first. What is capturing
your attention-what is most important here? Is it a close-up of a child
in rapt attention on the ball field, or the juxtaposition of team members
against the backdrop of green grass? Or the intensity of the sideline
parents? Look carefully. What do you see?
If you're doing a story on the team,
all these scenes are important. You'll have to prepare a whole album
to create a complete record of what went on that day. But you'll have
to do it one shot at a time.
It's likewise out in the field. Autumn
is always a real trap for the avid nature photographer-the colors are
so spectacular that it's easy to just point into the forest and shoot.
We have pages and pages of pretty-leaf pictures. Some of these shots
have served a purpose as eye-catching background graphics. But many
of them wouldn't be hung on the wall on their own. Why not? Because
we forgot to ask ourselves what we were trying to accomplish.
Sit down in front of a wild forest of
bright autumn colors and just look. What do you see? If you're patient,
some specific subjects will start making themselves evident. Look at
how the river scene glows with the reflection of autumn leaves and blue
sky. Move closer to capture the birch trees reflected in the water.
Crop in closer still to create an impressionistic painting of water
and light. Now you're making progress; your eye is sorting out the details.
Again, choosing what not to include in your picture is as important
as choosing what to include.
After you've chosen your subject, the
next step is to place it to its best advantage and turn it into a cohesive
picture.
FORM AND LIGHT
Shapes alone do not make your subject:
the form of your subject is governed by the light in which it is viewed.
Shadows and highlights will bring out the visual attributes of an object
that turn it from a mere flat form to an object with weight and depth.
It's the light's variations in intensity, angle, and direction that
give your subject impact.
Front lighting illuminates only the parts of the subject that are facing the camera,
and is usually considered normal lighting. Because it imparts
few shadows, it tends to create a fairly flat effect.
Side lighting comes at the subject
at a right angle to the camera. This lighting tends to bring out the
full effects of texture and form. Morning and evening sunlight usually
provide this kind of light.
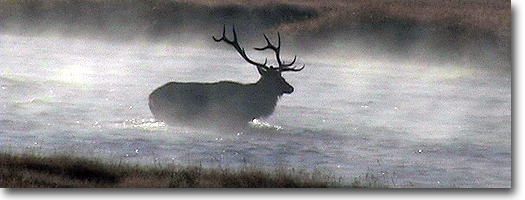
Back lighting is certainly the trickiest to use. The camera is unable to capture the
image exactly the way your eye sees it, because it cannot register the
range of contrasts the same way your eye and mind can when working together.
But it also has great potential for high impact, as with dramatic silhouettes.
The quality of the light will also have
an effect on your subject. Bright, direct light will create hard shadows
and reflections. Soft, diffused light will soften those edges and help
bring out colors and patterns. Dappled light can be a benefit or a curse,
depending on the subject. Watch how the light affects your subject,
especially outdoors. Light is ever changing, and the alternating shadows
and variations of tone will have an effect on your composition.
Light has direction. Determine whether
front lighting, side lighting, or back lighting is most appropriate
for your subject.
PERSPECTIVE: CHOOSING YOUR VANTAGE
POINT
Your eye perceives a subject based on
its spatial relationship with its surroundings. From a distant vantage
point, a mountain may look small and relatively near other objects in
the scene. But when you drive down the valley and closer to the mountain,
suddenly it becomes enormous, dwarfing everything else in its vicinity.
The other mountains that seemed so near are now completely out of view.
This is perspective-the interrelationship
between a subject and its surroundings as it pertains to your vantage
point. When you choose your perspective, you're choosing the angle that
you consider most effective for capturing this particular subject.
Many photographers automatically take
pictures from the vantage point that seems most natural to them, eye
level. But consider the impact of shooting the same subject from a higher
or lower perspective. Shooting up at the mountain will emphasize its
majesty and may isolate it from its surroundings against a background
of brilliant blue sky. On the other hand, climbing higher and shooting
down on it reduces its significance, showing it as just one of many
peaks in a range. This is your perspective. After you've chosen your
vantage point, select the lens that will allow you to include only as
much of the scene as you want. Use a wide-angle lens to take in much
of the area; use a telephoto lens
to home in on one aspect of the scene. Remember: you haven't changed
your perspective, you've only changed how much of the scene you wish
to share.
Perspective is the interrelationship
between a subject and its surroundings as seen from your vantage point.
THE RULE OF THIRDS: SUBJECT PLACEMENT
Changing your lens does not change
your perspective, it only changes how much ofthe scene you wish to capture.
There are no hard-and-fast rules regarding
composition, but there are a few guidelines that may help you decide
where your subject should be placed in relationship to the rest of the
scene. One of these guidelines is called The Rule of Thirds: divide the image into thirds vertically, and then again into thirds
horizontally. The intersections of these lines are all strong areas
in the frame. If there's more than one element in the image, placing
your main subject off center where the lines intersect can make the
composition more balanced and pleasing to the eye.
If, on the other hand, you're dealing
with a single element of interest. placement of the object will be closer
to center. Faces are a good example. the head should be in the upper
third of the box. The Rule of Thirds helps you avoid the amateur photographer's
curse: the bull's-eye shot, in
which the head is placed dead center. f
There are occasions, of course, when
absolute symmetry is called for. These subjects are best placed in the
center position.
If you're shooting animals or people,
always make certain they're looking into the frame-give them some space
in the direction they are looking, to give the image a logical framework.
If the most effective The upper
third of your subject is looking out of the frame, you'll lose any sense
of the subject's involvement with its environment.
THE POWER OF LINES, TEXTURE, AND REPETITION
Another important way to create images
with impact is to use lines to lead the eye to the subject: hard lines
can be used to suggest motion, aggression, restlessness; soft, rounded
lines might suggest a gentle, calming atmosphere. Lines can be absolute,
such as horizons, trees, or fence posts, or they can be suggested, as
a series of rocks, flowers, or
even shadows that draw the eye to the main subject. Converging lines
create very strong intersection points and can be a powerful way to
lead the eye.
Be aware that strong lines can also inadvertently
draw the eye away-for example, a horizon line to which you paid no attention
when you composed your shot might cut the image in half and destroy
the composition for which you were striving. The best way to test your
image for proper line definition is the squint test: look at the scene
with your eyes slightly squinted. What stands out? You'll notice the
strong lines that are the backbone of the image.
The myriad patterns in nature can also
make very strong visual images. If you're looking for harmonious repetition,
avoid anything that might interrupt the flow of the pattern. When you
locate a theme or repetitive pattern that interests you, try to isolate
it from the rest of its environment.
Eliminate any distracting elements and
find the angle of light that maximizes the effect. A low angle of light
will often bring out shapes and details that full sun would eliminate.
Repetitive patterns in nature can create images with a lot of impact.
FORMAT
Horizontal or vertical? Since most of
us photographers shoot at least a proportion of photographs with a 35mm
camera, we're generally working with a rectangular format. And because
of the way most cameras are built, we find it very easy to shoot most
of our images horizontally. Horizontal photographs are perfectly suited
to the nature photographer, and are often referred to as landscape
format, which tends to have a peaceful, harmonizing effect on the
subject. On the other hand, vertical formats, often referred to as portrait format, tend to connote a greater sense of energy.
A mountain scene in a horizontal format
may seem almost pastoral. Turn it to a vertical, and suddenly the sense
of energy and majesty increases considerably. A horizontal portrait,
on the other hand, may seem more casual and relaxed. So experiment!
Shoot images both ways to see which gets you the most impact. Also consider
the ultimate use of your images. Professional photographers often make
certain they end up with images that go both ways: horizontals are great
for wall calendars, while most magazine covers are vertical.
|